|
Introduction
A few of you have written in to ask what things you need in advance to follow me
projects. Well, I appreciate yer enthusiasm but yer don't want to go rushing off and buying loads of stuff in advance.
For one thing, me aim is to keep costs down. I know a few tricks which will get us around buying lots of expensive
items. Sure, yer'll need a few bits and pieces but its best I mention them as we go along. For example, this project
deals with lighting up specimens under the microscope. One way of lighting subjects so yer get to see more detail
in them is by using polarized (polarized) light. I'll get into the detail of this later, but if yer want to get
an inexpensive polarizer that will work with any microscope and help you through this project, you can get
it from Larry's Resources in the Onview
Shop
Formal Understanding
I'm gonna (going to) give yer an easy to understand summary of several lighting
techniques based on the idea of a light-cone. A mate of mine, who learnt to fly, talks to me about flying the wing,
stalling the wing to turn, etc., He understand that the plane doesn't fly: the wing does! Everything else - the
fuselage, the crew, us - the passengers, and the luggage is attached to the wing. The 'wing' flies - and everything else follows it.
So it is with Microscopy. The cone of light 'examines' the specimen. 'It' transmits
the specimen detail up a long tube to your eye. The cone of light is manipulated from the start of its journey
to its finish so as to 'resolve' detail in the specimen and carry it faithfully to our eye. We have constructed
a set of devices to manipulate that cone: lenses, discs, grids, color filters, wave-length managers, light sources,
apertures (shielded holes) to optimize the cone itself and the way its independent waves of light probe our specimen,
and depart from it carrying its quota of detail. This set of devices, correctly aligned, is the microscope -
but it is the cone-of-light and 'its' perfection
which allows us to see more than just with the naked eye.
If yer would prefer a more formal, and scientifically-eloquent account and description
of how a microscope manipulates and 'shapes' this cone of light, I would recommend yer purchase - The Microscope,
A Basic Guide by W.G. Hartley from the Onview
on-line shop under the books section!
The Lighting Debate
Much is written in the old traditional Microscopy books about different forms of
lighting. Many ardent enthusiasts still have heated debates about the more specialised lighting techniques. What
are they debating? They are challenging whether or not a particular form of illumination lights up a specimen in
such a way that false information is conveyed to the observer... like are they really seeing something that's there
or is it an illusion.
 I don't wish to get into such debate. Suffice it to say, and take it from me as gospel - no matter what lighting
yer use, nothing you see is a full and complete representation of the true nature of what yer observing. What yer
see down a microscope is a deformed, normally dead, falsely colored, clumsily 'propped-up' mess of its former...
and living self! Truth is, by the time we've sliced off a wafer, fixed it, pumped all the water, oil, and other
liquids out of it and replaced it with something to help support its collapsing structure - we're stuck with a
house that's just been through an earthquake.
But... and it is an important 'but', we get enough left to tell bricks from mortar
- if yer will excuse me metaphor... and by taking different views on it, and lighting it different ways, we can
get a little closer to the truth about how 'it' (our specimen) must have looked and functioned before us microscopists
came along and chewed it up this way and that so we could get a chance, the only way we know how, to see it magnified!
We get a better deal when examining living stuff like pond life but even here
- we often see less than the truth... but we'll talk about that another day.
The important thing about lighting..? There is only one to really remember: you need it!
That said, I'll take yer through the four most useful forms of lighting. I have
never had occasion to use any other form of lighting except these four, so maybe, just maybe, they will do enough
for you so yer won't ever need anything more.
The four forms (simplified) are:-
- Bright-field
- Incident Lighting (a light source option - not really a form!)
- Cross-Polars,
- Dark-Ground (Dark-field)
Incident and Transmitted Illumination
*Gulp*
Two techie words here and once again - confusing words for what they refer to. 'Transmitted'
means yer microscope has a built-in light which will transmit light from beneath a glass slide (containing the specimen) up into the first lens - called
the objective lens. I reckon that lens should really be called the 'subjective' lens because most stuff I look
at are subjects (living) forms rather than objects (never-living forms). The other form of lighting - termed 'incident'
lighting by microscope suppliers - is built-in overhead lighting which will shine down onto the specimen slide
from above. Not certain though why the word 'incident' should apply here, so if yer know - why not write in and
share yer thoughts with us.
Now, yer have to understand these two terms refer to lighting source methods only - from beneath or from above.
They don't represent 'forms' of lighting - which will involve a bit more about how light travels from either source,
through one or more 'devices' to light up whatever it is yer gonna be looking.
 I
never call these two light source methods anything else but 'under-lighting' and 'over-lighting'.
Much simpler and easier to say to others. Why not call 'em the way I do and help make life simpler for others too. I
never call these two light source methods anything else but 'under-lighting' and 'over-lighting'.
Much simpler and easier to say to others. Why not call 'em the way I do and help make life simpler for others too.
Bright-field Lighting
You'd think we were talking here about a floodlit football pitch or
baseball ground but we're not. The 'field' in this case is a fore-shortening of 'field-of-view'. Bright-field lighting
then is when yer light up a specimen from below so generally it will appear as a dark thing on a white or 'bright-field'
background. Our SP03 microscope is a bright-field microscope cos (because) it has a mirror to provide under-lighting
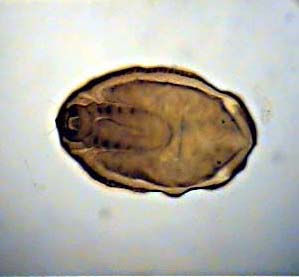
to the slide. Here's a mite lit (poorly) in Bright-field lighting:-
 Optimising The Light
When using under-lighting, several devices are often used on yer average
microscope to get the light onto the specimen in the best way to send a clear image up the tube through the eyepiece
lens to yer eyeball and brain. It doesnt matter if yer using a mirror or a built in light to get the light on its
way to the underside of the specimen, yer still need to do something to manage the light before it arrives
at the specimen.
 The
idea is to bung some light on the specimen in such a way as to provide maximum resolution - that is: the ability
to define detail between two close points of a specimen. Here's some resolution examples for yer. eample 1) "
example 2)# The
idea is to bung some light on the specimen in such a way as to provide maximum resolution - that is: the ability
to define detail between two close points of a specimen. Here's some resolution examples for yer. eample 1) "
example 2)#
Yer can see two little strokes in example 1 and four strokes in
example 2. If the dots on yer screen were bigger, there would come a moment when example 2 say, would just
look like this example 3) + (less resolved!)
To obtain some resolution, yer have to get a cone of light going
up through the slide. This way, each wave, quantum, point of light, will slowly separate from its neighbour - taking
with it a point of image detail from the specimen. The greater the width at the top of the cone, the greater the
points of light (and the detail they will be carrying) will separate and this will maximise resolution. The cone
is aimed and shaped so that the top of the cone hits the objective at the widest angle. This creates a limitation.
If you create a short wide cone too quickly, yer have to get that objective lens very, very, close to the specimen
to pick up all the detail and points of light before they whizz past the lens. Wide cone = best resolution! When
you create a wide cone (maximising resolution) yer end up with very little space to work between the slide and
yer lens and nearly end up trying to plough down thru the specimen to gather up all the cone of light!
[end skip]
Concave Mirrors
A cone of light is required to light up the specimen from beneath.
A concave mirror produces a very narrow cone of light. Yer need a wide cone (ice-cream end at the top arriving
at the objective lens) to get best detail from yer microscope. Most microscopes therefore have a lens called a
condenser just below the specimen slide. Light from yer concave mirror or other in-built light source is beamed
through the condenser to produce an evenly dispersed bright cone of light arriving at the objective lens. In reality,
the cone is really two: one with the narrow part converging at the specimen, and the other emerging from the specimen
and arriving 'fat-end' at the objective lens. By moving the condenser up or down you can determine where the top
end of the cone ultimately falls on the objective.
 Cones
Of Light Cones
Of Light
Is this idea of 'light cones' important? In one way - no! Yer simply
focus yer condenser, focus yer microscope, and fiddle around with the iris (that's the little shutter which cuts
off the edge of the light cone to turn up the contrast) and bingo - yer see an image. In another way - yup... it's
important - cos by managing that cone of light - yer can produce all sorts of ways of lighting up the specimen
and get to see it in various ways which might help you understand more about what yer seeing.
A Black Hole
Let's say we were pretty clever at managing light... like the Dutch
are clever at managing water. We could maybe make a black hole right in the middle of that cone of light. What
would we see?
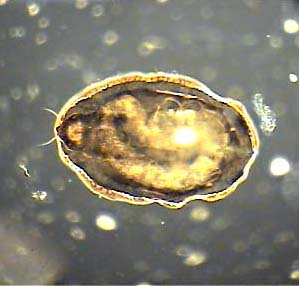
Well if we used our mite above as an example - we would see this:-
 Different, isn't is A bit like looking at a relief map rather than
a road map. When we stop light in the middle of the cone from hitting the specimen, the light at the edge of the
cone whacks through the specimen bouncing off the bits with the most extreme angles to the light cone edge. We
get an 'amplified' view of its depth, and the detail which was hidden in the normal light cone. This technique
is called dark-field or
dark-ground
lighting!
I'll show yer how to do this in a moment - it's an easy one to do!
Other ways of manipulating or 'interfering' with the cone-of-light is by 'Phase
Contrast', 'Rheinberg's Differential Color Illumination',
and a few others but not important right now to get going with me projects.
Cross-Polar Illumination
One which is good, and easy and cheap to set up and use, is Cross-Polar lighting.
In this method we stop, 'extinguish', most of the light coming through the specimen in the light cone. Only the
rays, or points of light, able to pass through a device, like an ultrafine cross-mesh screen, arrive at the objective
lens and go up through the tube. This has the effect of making certain specimens and subjects visible when previously
- illuminated and seen via a normal light cone - they are either colorless, ill-defined, or jut plain difficult
to see. Here is an example:-
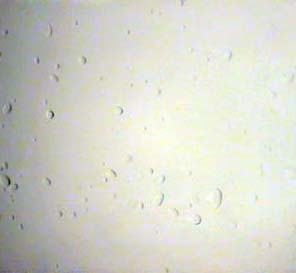
 This is potato
starch see in a cone of light produced by normal bright-field
illumination.
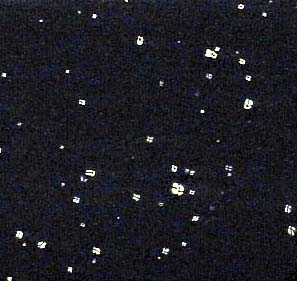
The one below was produced by interferring with the light cone with
a device commonly called 'cross-polars' to 'polarise' the light:-
 The image is a bit small here,but when you do it later in this project, you will
clearly see the 'signature' shap and structure of starch crystals!
 One
more thing! I'm using a bad lighting source for my images. It is a desk-top florescent light. It's better to use
a round halogen desk-top light if you have either an SP301 or a microscope with a concave mirror. You need an even
field of light for best results. You need to line up everything: light, mirror, condenser, iris, filter-holder,
so everything is nicely centered and parallel to with every other device in the light cone path. I'm in a hurry
to show yer things, so I've cut the frills and messing around with my set-up to show yer results which can be obtained
with the most coarse methods. One
more thing! I'm using a bad lighting source for my images. It is a desk-top florescent light. It's better to use
a round halogen desk-top light if you have either an SP301 or a microscope with a concave mirror. You need an even
field of light for best results. You need to line up everything: light, mirror, condenser, iris, filter-holder,
so everything is nicely centered and parallel to with every other device in the light cone path. I'm in a hurry
to show yer things, so I've cut the frills and messing around with my set-up to show yer results which can be obtained
with the most coarse methods.
If I show yer what can be done 'quick and dirty' - yer can soon find out for yerself
what can be done with a little patience and fiddling around.
Lets get going then and make a black hole for our cone of light so we can do dark-ground illumination!
|


