Repairing LOMO ОИ-14 Aplanatic NA 1.4 Condenser |
By Dushan Grujich, on April 20th. 2013 |
|
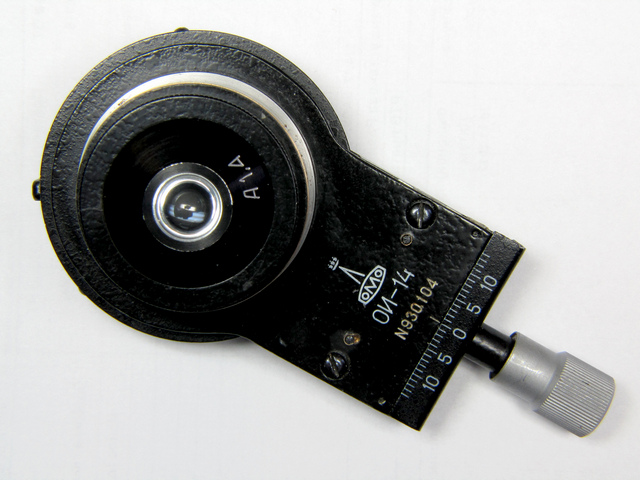
LOMO ОИ-14 i.e. OI-14 Aplanatic NA 1.4 Condenser for using direct and oblique illumination |
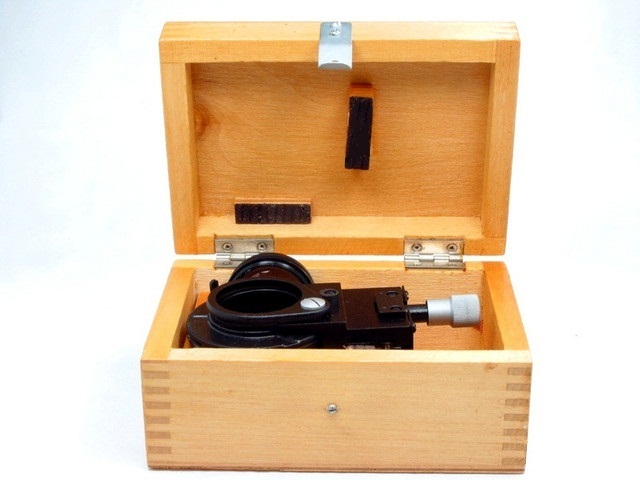
Condenser in its wooden box, as normally supplied by LOMO |
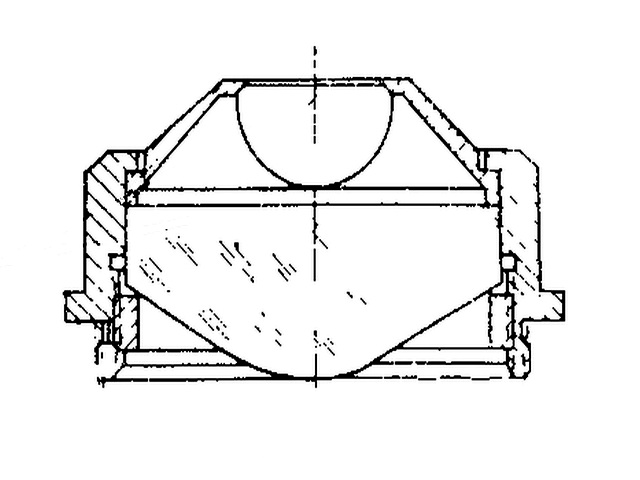
Cross sectional view of the LOMO OI-14 aplanatic NA 1.4 condenser |
LOMO OI-14 aplanatic condenser is designed for direct and oblique
illumination for use with biological microscopes. The optical system
consists of two lenses with focal length of 15 mm, lower condenser lens is aspherical.
When used with immersion oil its NA is 1.4. It is supplied in a set with a separate
lens, NA 0.30, for use with low power objectives and it can be mounted instead of
the aplanatic condenser.
As experienced by many a user of the LOMO aplanatic condenser I too have had the same thing happen, the upper lens of the condenser got loose. As it is clearly shown by the cross sectional drawing and as explained in the handbook1 the top lens is only glued. I was not able to find the exact reason why it was done by gluing and not by mechanical means as it was done with KOH-3 NA 1.2 Abbe condenser. Although the same method of gluing the top lens was practiced by Carl Zeiss Jena in 1950s through the 1960s, as observed on their NA 1.4 aplanatic condenser found on the Nf and Ng stands. |
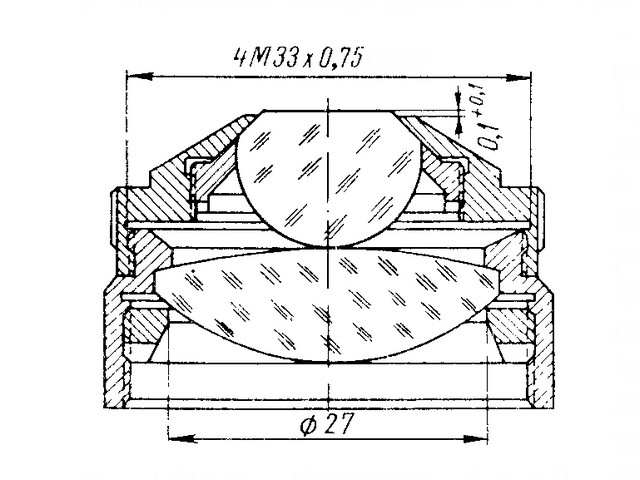
Cross sectional view of the LOMO KOH-3 NA 1.2 Abbe condenser |
Below are the words of one of the Russian service engineers : "For many years the upper condenser lenses were mounted with a threaded metal ring. I think that person, who thought of gluing them, has received a large bonus. I wish I could find him and force him to personally glue all those lenses, which have fallen off during the years of use. Now, it has fallen onto me to glue them back as it is I who is doing the service of laboratory equipment and microscopes." I was told that upper lens coming loose is a frequent failure, and enquiries among Russian service engineers did not bring any clarification or answers as to why. When I asked how is the repair effected in their workshops, the answer was that it is a simple process almost identical to the way done in the factory. The housing is placed upside down on a flat horizontal surface, then the lens is placed in the housing and glue is applied. The explanation that followed said that there is only one way for the lens to sit in its place for it cannot be positioned crookedly. This was quite the opposite to what I have seen Ted Clarke has done and described in his article. Although I had doubts in my mind I proceeded with the repair as suggested, knowing that I can easily start from the beginning and correct any mistakes. The cement which LOMO used was quite unknown to me, except by its name, so I decided to use the colourless acrylic nail polish, partly because that was advised in the Micscape article and largely because the process was easily reversible if something would go amiss. |
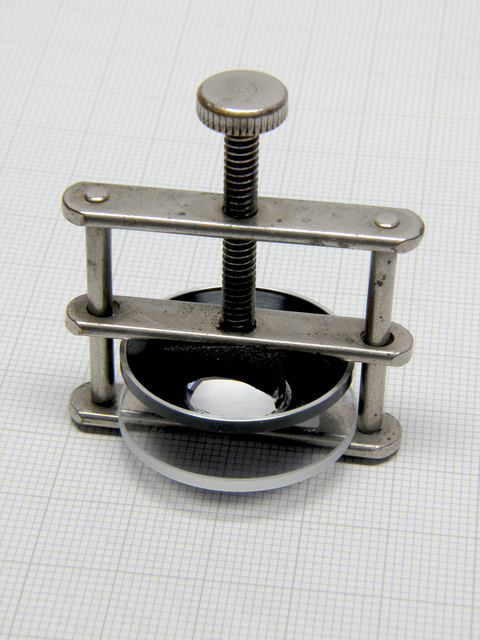
The tools that I used to repair OI-14 condenser |
As self evident from the image the tools are quite simple. Nail polish, an
insulin syringe for applying the nail polish, a holding "jig"- the
Hoffman tubing clamp, which
I got out from my tool box not at all remembering how it got in there, complemented with flat a 2.0 mm thick
mineral
watch glass and with a small piece of soft, sponge like, rubber placed on top of
the lens to protect it from accidental scratching while held in clamp.
It must be stated that all the remnants of the original glue must be removed from the lens and from the metal holder, entirely. Preference must be given to a solvent as mechanical means of removal could damage the top lens or its seat and cause lens to be mounted inclined, thus I have used Chloroform - CHCl3, parts were submerged in chloroform in a small glass container with cover and then placed in the ultrasonic cleaner for the duration of about ten minutes. It is not absolutely necessary to use chloroform as a number of other solvents can be used although one needs to establish which one will do the job, done by test with a drop or two on the glue. |
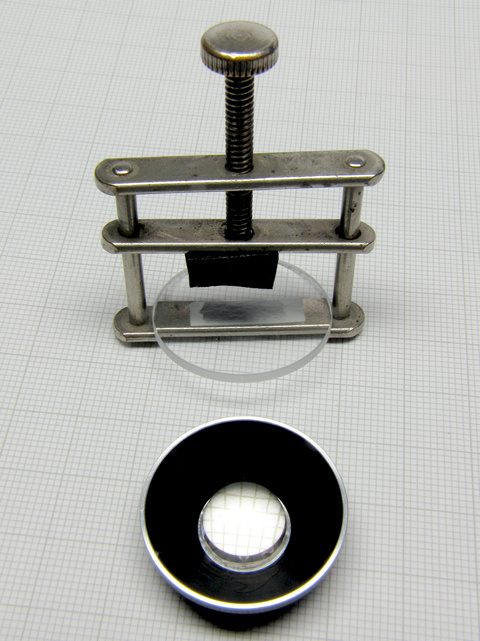
Closer look at my "jig" for holding the lens and its housing until nail polish can set |
|
Nail polish drying up |
|
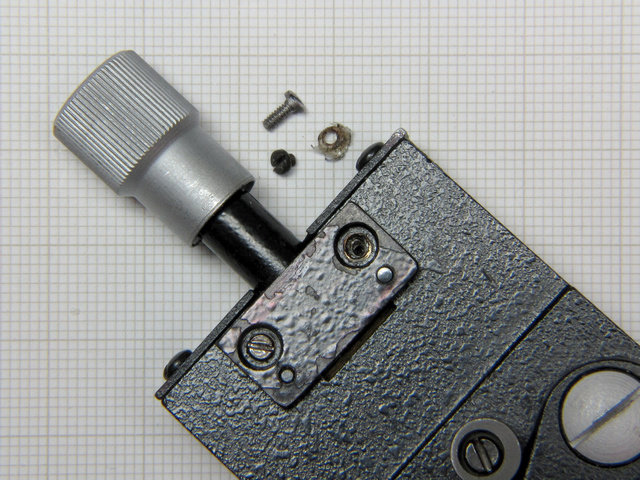
While nail polish was drying, I decided to clean the rather stiff oblique
illumination mechanism, rack and pinion. As I was disassembling it I found
that one screw was broken and the leftover part with a screw head was just superglued
to the body.
Oh well, I drilled through the old screw, cut a new thread and made a new screw. Image above shows the broken screw leftover and a superglue remnant next to the newly made screw before I blued it. After I cleaned the mechanism I assembled it back and it is now working smoothly without danger of destroying the plastic rack. Another legacy of someone at LOMO factories. I must add that in the older production LOMO always used brass for making racks, from mechanical stage through substage condenser mechanism and all places whereas in more recent production brass has been replaced with plastic. |
I feel that I must add that I have checked the position of the lens after the nail polish has set. Not being able to use optical means of checking I have used the only means that I have at my disposal i.e. a high precision dial comparator with measurement accuracy of 1 micrometer, comparing the parallelism of the lens top surface against the seating plain of the metal piece holding the lens and have thus confirmed it to be within ± 2 micrometers (measured at the room temperature of 20ºC ) checked radially at six points of the top lens surface along the lens circumference, 60 degrees of arc apart. |
As it is, the nail polish repair is holding up and I am happy with the result. Although I would like to hear from David Walker and/or Ted Clarke about how their repairs are holding up. |
Above image of PA is an example of the oblique illumination produced by repaired OI-14, LOMO 40/0.65 achromat objective and a simple 1.3 Mp digital USB eyepiece illuminated by a LED converted OI-32 |
Since I have initially repaired my own OI-14 condenser, and since writing this article, I have repaired two more LOMO OI-14 condensers and I am happy to report how none of the three have failed so far. In the meantime, I have received response from Ted Clarke reporting repeat failures of the OI-14 repair, where in his latest repair he used epoxy resin to cement top lens element to the aluminium carrier cap. Solvents used to dilute immersion fluids most often are Toluene C7H8 and Xylol C8H10, and it is well advised, prior to using the cement, to test its ability to resist solvent in order to prevent future failure. |
References: |
1. "Mikroskopi" G.E. Skvortsov, V.A. Panov 1969 p 252-254 |
2. "Optika Mikroskopov" V.A. Panov, L.N. Andreev 1976 |
3. "Repair of the Lomo 1.40 NA Condenser" Ted Clarke 2006 | |
Author's email: dushangrujich AT gmail DOT com | |
Published in the October 2013 edition of Micscape Magazine. | |
www.micscape.org | |