Examples of the animation of macro and microscopy subjects using sequential jpeg images. by Dave Walker (UK) |
Animations in a web page are a very effective way of presenting many microscopy subjects. Two common methods are to either embed a video clip or an animated gif image in the page. Video can work well for presenting real time motion e.g. of live microorganisms and animated gifs can be effective when each individual 'frame' of the animation needs to be photographed.
However, the gif image format only records 256 colours and is unsuitable for many microscopy subjects. For stills, the 24 bit colour of jpeg files is ideal but apparently can't support animations in the way the gif format can. Commercial software (e.g. by Macromedia) is available to create animations but one no-cost alternative is to write script for the web page to display a sequence of jpeg images in a fixed page area to give the effect of animation. The author's scripting knowledge beyond simple html is non-existent but there are clever folk out there who have written such scripts and have kindly made them available for free use. I liaised with Rene van Wezel to present his focus sequences of marine dinoflagellate skeletons using such a JavaScript ('Image Cycler') written by D Keith Higgs and offered on the JavaScript Source website.
I was impressed with how easy this script was to use (thanks to the script author D Keith Higgs); the script is short and with the author's clear instructions it's easy to know where to insert the jpeg images and there's a timing parameter which can be tweaked to control their display. So I decided to try animating a selection of subjects and are shown below with notes on how they were created.
Comments to the author Dave Walker are welcomed.
Acknowledgement: Many thanks to D Keith Higgs for the 'Image Cycler' JavaScript and to the JavaScript Source website for hosting this and many other scripts.
Related Micscape articles: Animations built from sequential stills can also be viewed in Martin Mach's Radiolarian shells: three small projects in digital imaging for microscopists and David Walker's 'Polar exploration'.
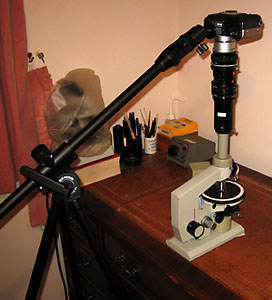
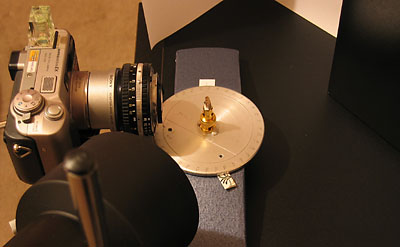
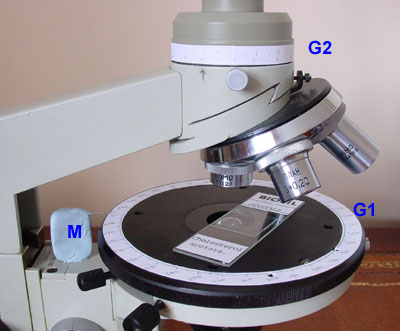
Depth of focus sequences: As remarked above, Rene van Wezel's images admirably show the effectiveness of the script for presenting the three dimensionality of subjects at mags where the depth of field is shallow. If the microscope fine focus has the usual graduations, the reading for top of focus and bottom of focus can be noted for a subject and a sequence of jpeg images at practical increments between these focus points can be made. (Another approach is image stacking but animations give a nice feel of microscopy in action.) One note on inserting the image files in the script: for say five images at sequential focus levels they are best embedded in the order 1-2-3-4-5-4-3-2 which the script will display in that order and then restart at 1. This gives a sequence of smoothly focussing down and then smoothly back up through the subject. Rotating the subject: Ideally a microscope with a centring rotating stage is required. If not, graduated rotating subject holders are available quite cheaply from dealers or can be made. The author's LOMO Biolam microscope has a centrable rotating stage but is uncalibrated in degrees, so a few minutes work with protractor, paper and paper glue produced a workable graduated stage G1 as shown above with needle in plasticine as marker, M! The subject can be photographed at sequential settings of the stage graduations. The vertical tube is also calibrated, G2, where this is required. Image processing: Changes in brightness, contrast or image size / centring will be very noticeable in a jpeg sequence so it's best to adjust these and maintain constant before image capture. If the camera vignettes it's best not to crop images after taking them as it's difficult to crop in identical places. In some animations below I retained the vignette to give the effect of looking down a microscope, others I used some digital zoom before taking each image. Jogging the camera and / or subject is more likely for multiple images, so extra care needs to be taken to keep the set-up steady. If like the author you're not lucky enough to have a dedicated work area for your hobby, a tripod may be handy to increase rigidity as shown here with Sony S75 mounted on the LOMO with reversed SLR lens as relay lens and couplers. The Benbo design of tripod with boom (my brother's) is a useful one for off-axis support. |
Click each of the stills below
to open the animation in
a new browser window.
Images were taken
on a Sony S75 digicam.
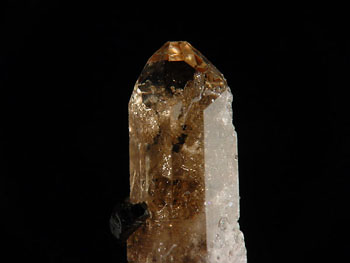
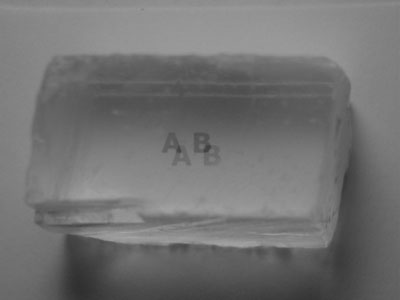
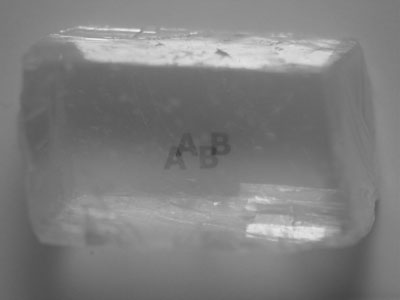
Macro subjects
Microscopy subjects
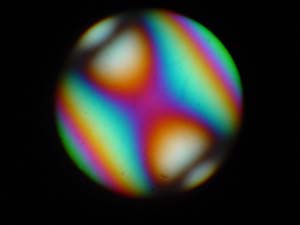
Polarisation subjects 1. Conoscopy.
|
The mica was centred on the stage and the microscope set-up for conoscopy (i.e. essentially, focus at ca. 40x in crossed polars, open condenser iris fully and view down the tube with eyepiece removed; see this article). The image was projected into the camera with a phase telescope and 24 jpeg images were taken at 15º intervals which was judged to be sufficient for a smooth animation without too large a download; each jpeg image is 10 kbytes so the sequence is a modest 250 kbyte. An unnamed 40x NA0.74 objective was used. Higher NA and thicker specimens can achieve more detailed interference patterns but on my microscope, colours were not as intense, so this type of objective was a good compromise. |
Polarisation subjects 2. Crystals
/ mineral grains.
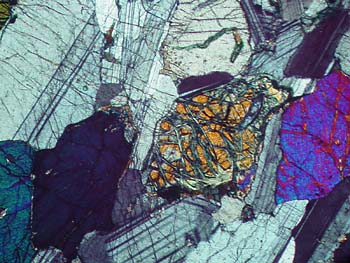
In principle such animations can be recorded in real time by full colour video, but for a smooth effect a method of evenly rotating the stage through 360º without vibration would be needed. It's doable e.g. with a suitable motor and geared stage but not as straightforward as creating a jpeg sequence. |
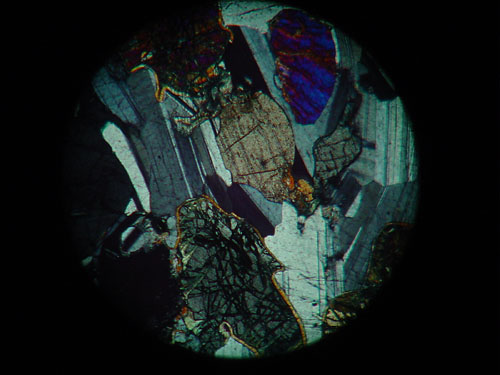
Above:
Thin
rock section of gabbro (Open University (UK) slide from set
S640) rotated between crossed polars. Although this is the most informative
way of viewing, i.e. observing the effect of rotation on the
mineral grains while maintaining the extinction, it's not very satisfying to observe (or animate) as each mineral grain has to
be tracked around as it rotates. There are polarizing microscopes
that avoid this by rotating the coupled
polarizer and analyser while maintained in extinction with a
stationary stage / specimen (e.g. the J A Swift &
Son (London) Model PD after a design by A B Dick). However,
microscopes of this design can attract high prices.
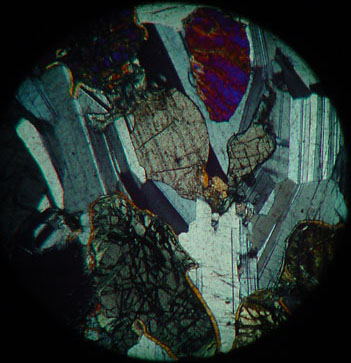
But an alternative for web presentation at least is to rotate each sequential image in software back the number of degrees the stage was rotated from zero, as this angle is known for each image. Below is the exact same set of images as above but rotated in Photoshop Elements using this method. The effect of rotation between crossed polars on each mineral grain is now easier to observe. To avoid any image shift in the animation, a more sophisticated graduated stage than the author's homebrew is preferred(!), but there's relatively little shift for the crude stage calibration described above. |
Below: Animated jpeg sequences can also be made by keeping the subject stationary on the stage and rotating the analyser above it. This is not as scientifically meaningful (e.g. for thin rock sections) as crossed polars aren't being maintained, but attractive sequences can be created as shown below for the gabbro section. On the author's Biolam, the sequence was created by using the graduated vertical monocular which held the analyser. This has to be rotated while maintaining the camera stationary above the tube. |
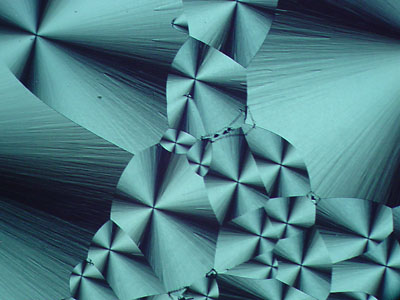
Below: Cholesterol acetate (Biosil prepared slide).This is also an animated jpeg sequence made by keeping the subject stationary on the stage and rotating the analyser above it. This sort of sequence works well with crystal formations with a radial symmetry. |
Please report any Web problems or offer general comments to the Micscape Editor.
Micscape is the on-line monthly magazine of the Microscopy UK web site at Microscopy-UK