Help! Just from reading Micscape, I know that there are a lot of ingenious and imaginative people out there, so this article is both an exploration and a challenge: an exploration of a few possibilities that have occurred to me and a challenge to Micscape readers to come up with yet better suggestions.
I continue to encounter specimens of what might be described as being of an “intermediate” size, that is, they are not truly in the micro-realm of the compound microscope, being too large to examine properly with such an instrument, but they are small enough and have enough fine detail such that a magnifying glass is insufficient. The obvious solution is a stereo-dissecting microscope and here’s where the problem begins. For specimens of this sort, microscopists haven’t yet come up with some standard types of mounts, whereas, there are indeed several models for mounts for compound microscopes and, for stereo microscopes when the specimens are of a certain size and/or shape. In the October 2001 issue of Micscape, Brian Darnton presented an account of his splendid techniques for mounting some of the larger forams and small colonies of bryozoa. Nonetheless, as valuable as this method is, it doesn’t address the problems of size and thickness of the specimens which I have in mind.
Let me be more specific. I have long been fascinated by the spines and plates and scales of invertebrates and some of these fall into that indeterminate size range which makes them difficult to mount in a fashion that is both useful and pleasing. Certain mineral collectors specialize in what they call micro-mounts. The minerals are mounted in small plastic boxes of varying sizes, the smallest being about 1" x 1" x ½". The are examined under a stereo microscope. One of the advantages of much micro-mounts is that one can select from exquisitely beautiful displays of crystals that are only rarely found in larger clusters. The plastic box also has the virtue of keeping dust off the specimen.
One can select from several types and sizes of boxes–1" x 1" x ½", 1" x 1" x 3/4", 1" x 1" x 1" are very convenient sizes. Generally, I prefer the type which has an attached, hinged lid, but sometimes it’s more convenient to have removable lids. You can purchase transparent boxes or ones with an opaque bottom and a transparent lid. I like to keep some of both types on hand. I tend to avoid ones that have both an opaque top and bottom, since cataloging and locating can sometimes be easier with a transparent top. The selection of an opaque or transparent bottom is finally a matter of illumination and specimen type. Rarely is there any advantage in terms of illumination to having a transparent bottom. One kind of exception is when you have only one example of a particular kind of specimen and you want to mount it in such a way as to be able to view it from both top and bottom. This means that you can’t use most household adhesives. Probably the best means is to use a very small drop of balsam or a synthetic mounting medium as the adhesive. You will need to make sure that the solvent of your mounting medium won’t dissolve the plastic of the box and produce a cloudy mess.
Box mounts require either side or top illumination and perhaps the best sort is provided by a fiber optic illuminator as it will allow for a wide range of illumination possibilities.
Recently, I got interested in looking at the shells of shipworms which are really radically modified mollusks. I have a wide-mouthed quart jar which contains 5 or 6 slices of wood stored in alcohol.
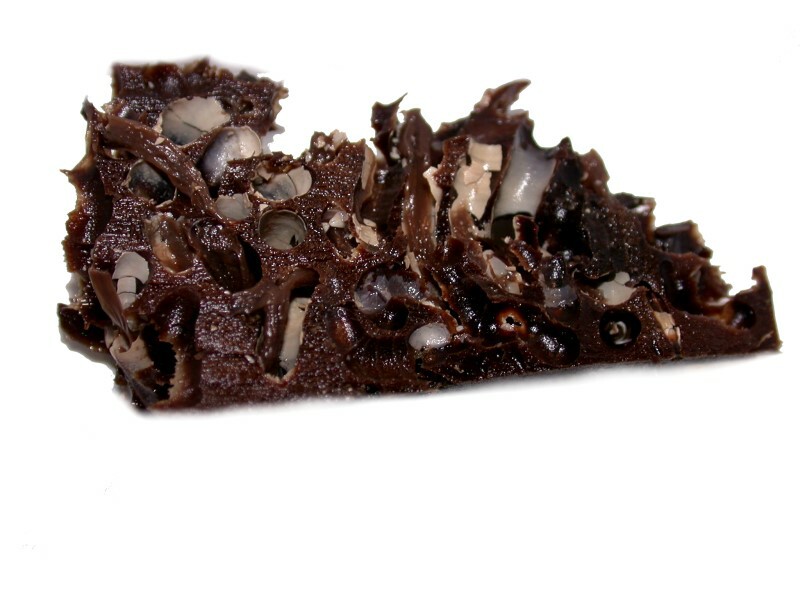
They are riddled with holes and tubes and look rather like a wooden version of Swiss cheese with the significant difference that the wood is a dark brown and many of the tubes and holes are lined with a thin white coating which is a mixture of a calcareous deposit and mucous laid down by the “shipworm” to facilitate its travel through its burrows. These structures and the pallets (which I’ll talk about in a minute) are the reason for storing these specimens in pH neutral alcohol. When they were shipped to me many years ago, they arrived in formaldehyde and I immediately transferred them to 70% alcohol and they have held up well. One can, of course, also keep them in formaldehyde at a neutral pH by adding a marble chip or two to the jar. However, I find that is highly preferable to work with specimens transferred out of alcohol and soaked in tapwater than to work with formaldehyde transfers. The toxicity of formaldehyde and irritation from the fumes of both it and methanol added to it, make it much more reasonable, in most cases to work with alcohol preserved specimens. Naturally, there are exceptions such as plankton samples.
The shell has been reduced to two ridged structures at the anterior end of the “shipworm” and they have a remarkable design.
This one is broken, but the ridges that perform the tunneling as they are rotated are clearly visible.
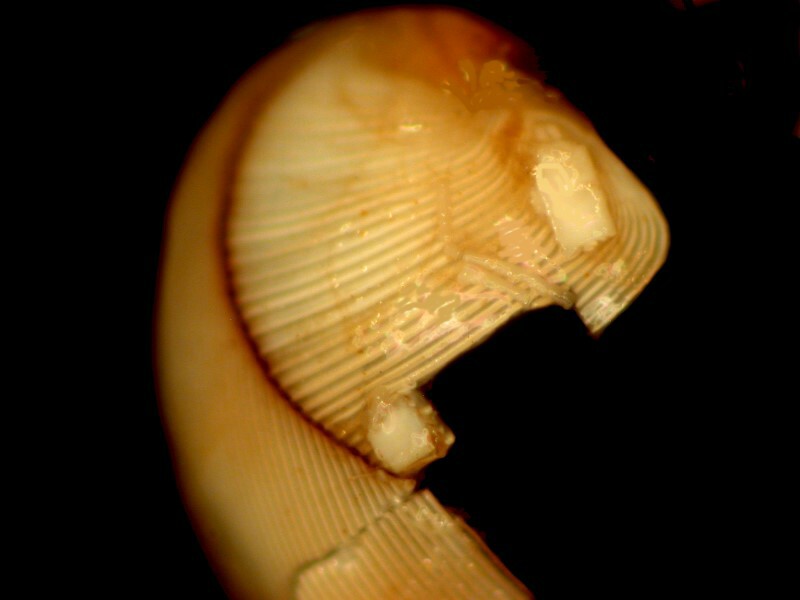
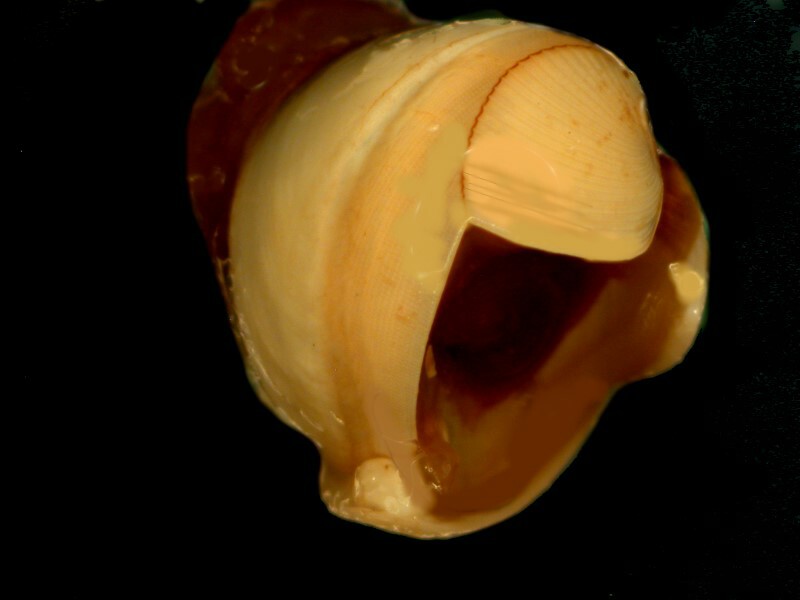
The muscles attached to these structures allow them to be rotated at 180 degrees and the ridges or “rasps” are used to tunnel through the wood. The first specimens I found were incomplete having been severed when the wood was split into smaller sections to fit into the jar. However, with a bit of patience and practice I was able to extract some complete specimens and I got an interesting surprise. At the posterior end of the “shipworm” opposite the shell (jaws) is where the siphons are located along with two intriguing calcareous and chitinous structures called pallets. The first image shows the 2 parts which face each other in situ and form a sort of “plug”. The second image is a closeup of one of the pallets. Note that they have an extended calcareous rod which extend quite a distance into the tissue of the mollusk.
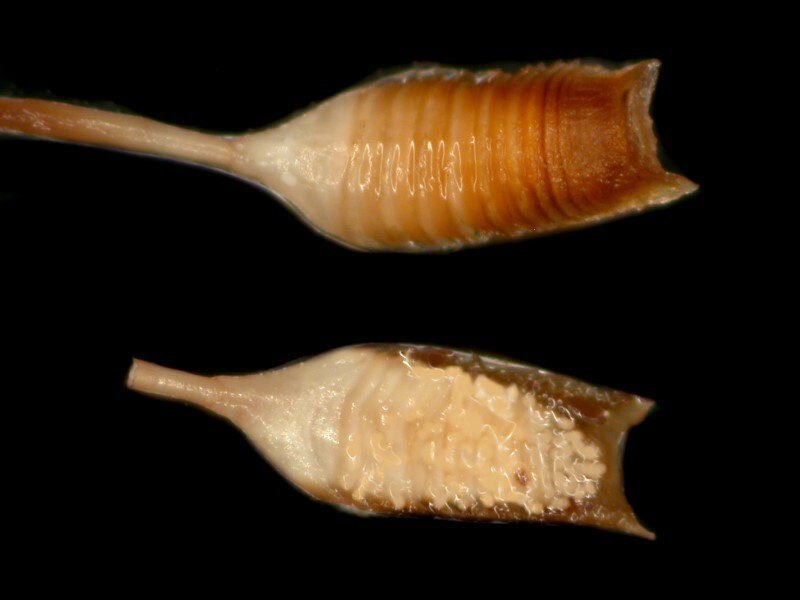
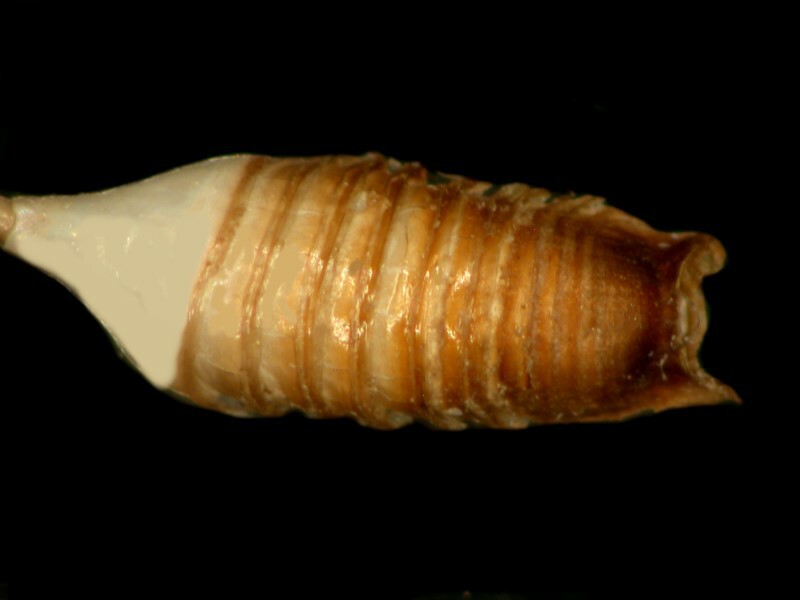
I had assumed that my specimens were of the genus Teredo, but when I consulted a reference work, the drawing of the pallet corresponded to the genus Bankia which it stated is restricted to the Mediterranean. The reference book also had a drawing of a pallet of Teredo which was very different from those in my specimens. So, 1) did the labeling get reversed in the reference? 2) are the specimens which I got from Florida really from the Mediterranean? Or 3) did Bankia get transported accidently from the Mediterranean to the Gulf of Mexico by ships? In the end, of course, it doesn’t matter that much, but it is a puzzle for me to contemplate on cold winter evenings and, of course, it may very well be of significant concern to those who have to deal with the impact of invasive species. The kind of pallet which I found looks somewhat like a compact palm leaf or feather–white, elongated, and encased in a brown membrane which I take to be chitinous.
The function of these pallets is like that of the operculum in gastropods (snails). When a gastropod retreats into its shell, it has a chitinous disk attached to the foot and when the foot is pulled back into the shell the operculum closes off the opening providing added protection. The pallets in “shipworms” function in a similar fashion.
Some of the shells are several millimeters in height, so how should one mount them. Certainly, the plastic boxes are an option and would allow for mounting several pairs in one box or a pair of shells (jaws) and a pair of pallets. If you use a box with an opaque black bottom, the contrast with the white shells can be quite striking.
A second option is to select a relatively small pair of shells (jaws) and use a glass or aluminum ring glued to a standard slide. However, if your specimen requires a depth of more than 2 millimeters, then glass rings become difficult to obtain and are rather expensive. To obtain aluminum rings taller than 2 millimeters, you would probably have to cut them yourself from aluminum tubing. Such mounts need to be sealed with a cover glass against that perpetual enemy of the microscopist–DUST!
If one has a workshop with the appropriate sorts of miniature electric tools of the type that many hobbyists have, such as those who make model airplanes or trains, then it is possible to make rings from a variety of substances and in just the thicknesses you want if you have the expertise, the patience, and the equipment (I have none of these.). One can make mounting rings out of wood, bone, plastic, aluminum, soapstone, or if you feel really exotic–jade.
I have also experimented with some mounts of various types of wildflower seeds using glass plates of two sizes, either 2" x 2" or 3" x 3". They can lend themselves to quite handsome arrangements, but the problem is proper storage to keep the dust off.
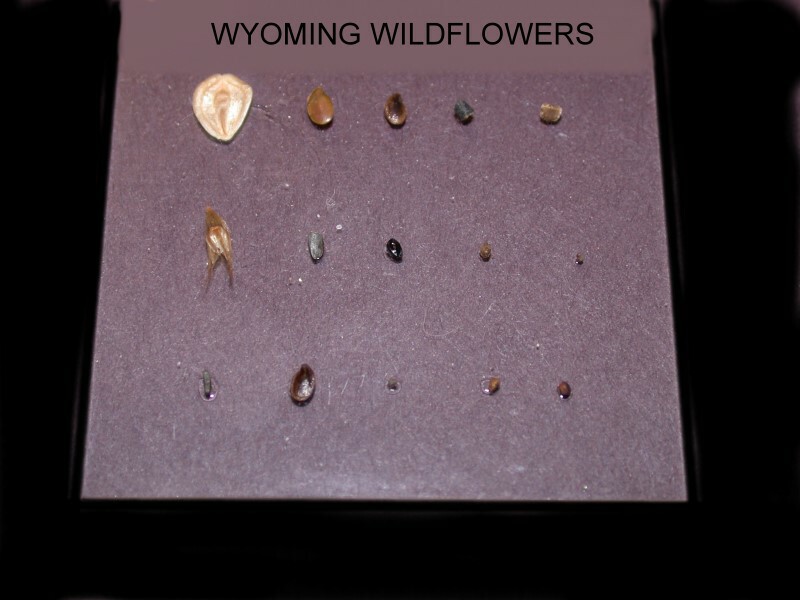
It would be nice if one could obtain plastic square mounting cells of varying thickness and in a size of 22 x 22 mm, which would allow the use standard cover glasses, but so far I have not come across anything of this sort. [Take note biological supply houses!]
Occasionally, at a surplus store, one can still find small round metal tins with lids, the kind of tin that used to be used for ointments and with the appropriate adhesive and interesting specimens, they too can produce very attractive mounts. If the metal bottom is too shiny, one can cut and glue in a circle of suitably colored construction paper, which helps minimize the problem of finding a proper glue for the specimen which will adhere to the metal.
The problems with all of these types of mounts I have mentioned here are several: 1) consistent availability of the materials, 2) reasonable price, 3) finding appropriate adhesives, and 4) if you’re producing your own wooden slides or plastic mounting rings, then you have to have specialized tools and a considerable amount of patience. For example, cutting plastics with high speed electrical tools can generate enough heat to melt the plastic and gum up the bit or blade, besides which certain plastics can produce toxic vapors. If you are cutting aluminum rings for mounting, do it well away from the all your optical instruments, since the “dust” from the aluminum is abrasive and can cause serious damage to lenses, not to mention lungs and eyes. This also true for plastics, glass, bone, etc.
I suspect that mounting “intermediate-sized” specimens will remain a challenge to our ingenuity. Several years ago, I bought on sale a number of boxes of cover glasses which are 24 x 50 mm. They are very handy for covering paleontology slides with grids of 60 squares. However, it seems to me that this would also be a nice size for mounting the “intermediate” specimens. Unfortunately, some of these specimens would require a support cell for the cover glass of 5 mm or even 7 mm. Not an easy sort of mounting cell to construct.
So, please share your own solutions with Micscape readers and send an article or even a brief note to Dave Walker.