Several years ago, I wrote an article on vital staining which a fair number of people found of interest.
In this essay, I want to make a few more observations about vital staining, but I also want to broaden the context to talk about some other kinds of staining techniques as well.
The great virtue of vital staining is, of course, that the organisms continue to function and, ideally, behave “normally”. I use the quotation marks here for 2 major reasons: 1) We need to be cautious about assuming that the behavior of organisms taken from a laboratory culture establishes a standard or norm that is the same for its behavior in its native environment. 2) The introduction of a foreign chemical substance, the vital stain, may produce subtle biochemical changes that are very difficult to detect or else appear only after several generations revealing a mutagenic effect.
In the table which I reprinted from McClung in the earlier article, one can see that there is considerable variation regarding toxicity depending upon the particular stain employed. The dilution of the stain is also a crucial issue. Nature is always presenting us with wonderful, if sometimes, maddening challenges. First, assume we’re working with a freshwater organism. In making up the staining solution, should we use distilled water from the grocery store, triple glass-distilled water, artesian water, tap water, filtered pond water from the organism’s environment, or a nutrient medium, such as, Giese or Chalkey’s salts? Each one of these may produce different results or it may not matter at all. Ain’t science fun? I usually use artesian water which I buy by the gallon at the grocery store. Distilled water is toxic to some protists; with pond water, even though filtered, you run the risk of cysts from other organisms; if you boil the pond water, you may kill the cysts (or not) and you run the risk of producing some byproducts that could prove to have adverse effects on the organisms you’re staining; the salt media can sometime interact with the stain producing undesirable results; and, of course, tap water will likely have chlorine, possibly fluorides, and certainly unpredictable salt contents. Try them all; I think I’ll stick with artesian water.
Now, suppose we’re dealing with a marine organism. Here salinity may be an important issue, particularly if the organism is estuarine or living in an area where there is an influx of freshwater. The real issue here is whether to make up the staining solutions with freshwater or saltwater. In some cases, the interaction of saltwater with the stain may produce undesirable consequences, such as, precipitates. If you are able to establish cultures of the organisms, then it is usually best to use the standard solutions made up in freshwater and, in these instances, you can frequently use a slightly more concentrated solution since the volume of water in the culture will act as a dilutant. As a general rule, I make up my stain solutions at 1% which allows me to make dilutions for both vital staining and the staining of fixed, preserved materials.
The major difficulty with marine organisms arises when you have only a few specimens and/or need to do some quick tests for microscopic examination. If you have a specimen on a slide in a drop of seawater and you add a drop of stain prepared with freshwater you may, among other things, radically disrupt the osmotic balance; thus adversely your specimen. In these situations, it probably best to risk making up your stains with filtered or artificial seawater.
When feasible, it is best to work with organisms, whether marine or freshwater, that are readily cultured in the laboratory. When a stain is introduced into a rich culture, there is the possibility of observing the longer term effects and seeing whether different individuals react to the stain in different ways.
Sometimes I use vital stains in concentrations higher than recommended. There is an interesting range between toxicity in varying degrees and lethality. This rather ill-defined area has not been extensively explored. In fact, it was precisely in this fashion that I produced my infamous 3-headed specimens of Lacrymaria.
Of course, the stain I was using was Acridine Orange which is a known mutagen, so one might well expect some strange results. Another of the projects on my list is to try vital stains on Stentor coeruleus which is notorious for “monster formations.” Apparently S. coeruleus is extremely sensitive to environmental factors. I have seen a variety of bizarrely-shaped “ciliates” swimming around which have no resemblance to the traditional shape of S. coeruleus. The tipoff was the distinctive dichroic blue-green/rose pigment called stentorin which these strange motile fragments of monsters possessed. What I am now curious about is whether or not some of you will beat me to these experiments to find out if this is the case, since I don’t have any Stentor cultures at the moment and last week the temperature got down to -29ºF.–not ideal weather for collecting. Over the years, almost every sample or culture containing S. coeruleus that I have had for any length of time, ended up producing monsters. Monster formation has also been reported in Paramecia and a number of other ciliates. I do have some Paramecia so, if I get a chance, I may try inducing monster formation in them although it is a much rarer phenomenon in Paramecia. A particularly interesting example of monster formation occurs in the pink ciliate Blepharisma as gigantism and the giant forms become cannibalistic feeding on the smaller Blepharisma.
Successful staining is partly technique, partly an art, partly luck, and an enormous amount of trial and error. There is a formula for a stain that is supposed to be excellent for flagella. I have mixed up batches of it at least 6 times. It is not a vital stain, so it seemed to me that the results should be straightforward. I followed the directions, a bit more scrupulously each time, but it never came out right. I finally ended up buying a special flagella stain from a biological supply house.
Picric acid is sometimes used as stain and as a fixing agent in reagents, such as, Bouin’s fluid. When I was working on Lacrymaria, I read a paper by a researcher in England, who presented some very interesting information. Unfortunately, he used osmium tetroxide as a fixative–an extremely toxic substance which should be avoided by amateurs, but if used, handled only under a fume hood to which I do not have access. So, I sent him an e-mail asking whether he had had success with any other less toxic fixatives. He replied that he had. He found a bottle of Bouin’s fluid which was at least a decade old and had gotten quite good results with Lacrymaria. He left the bottle out on the work bench and the next day when he went in, he discovered that a laboratory assistant had thrown out the old solution and mixed up a fresh batch for him. To his dismay, the new solution did not produce good results. I doubt if anyone knows why this should be the case. In the meantime, for the last 8 years, I have been aging a bottle of Bouin’s fluid and when I find some more Lacrymaria in the spring or summer, I’ll try it out. [WARNING: Picric acid crystals MUST always be kept in solution and kept away from any metal with which it might form picrate compounds. The dry crystals and picrate compounds are unstable and are high explosives. Picric acid is Trinitrophenol, a close relative of TNT.]
The anomalous results of the older Bouin’s solution in relation to the fresh solution is a situation which one can encounter with a variety of stains. Various textbooks and chemical companies make recommendations regarding the shelf life of both powdered stains and solutions. The textbooks are correct in some cases, but even when I make up a fresh solution of a stain, I still keep the old one and have, from time to time, gotten some very interesting results with the old solution. Certain stains, in fact, require aging before they will work effectively and some of the classic stains of this sort are certain hematoxylin solutions. Some researchers “age” them artificially by the addition of chemicals. My own experience has been that the naturally aged ones are preferable. Other stains which can produce different, and sometimes more striking results as they age, are polychrome stains, such as, Methylene Blue and Crystal Violet. These, like a number of other powered dyes are never quite “pure”, that is, they always contain small amounts of other dyes which will vary from batch to batch.
The “purity” of stains which come from natural sources is always an issue. Cochineal is derived from the outer membrane of the scale insect, Dactylopius coccus, which feeds in the cactus Opuntia; Indigo is a plant extract and was derived in Europe from wood, but gradually supplies of the dye coming from India supplanted the European ones and also hematoxlyin which comes from logwood, Hematoxylon campechianum. With advances in chemical refining and synthesis, these dyes are much more reliable than those of the 19th Century.
Carmine, derived from the treatment of cochineal, is wonderful for demonstrating food vacuoles in protists, such as, Paramecia. Carmine is virtually insoluble in water and accumulates in the vacuoles, thus vividly demonstrating the locations and, if you are very patient, you can track the path of their movement and see one move to the cytopyge at the membrane and expel its waste. Since this works so well with Paramecia, it’s only natural to try it out on every ciliate one comes across to observe the positioning of the food vacuoles. Ah, the perversity of nature! Naturally, there are some ciliates, among them large and interesting ones, that seem to have a “built-in sensor” designed to reject non-digestible particles, thus denying us a view of the vacuoles filled with carmine particles.
Another intriguing stain is Nigrosin. If you take a drop of a rich culture of Paramecia and mix it on a slide with a drop of Nigrosin (1% will do) and let it dry, you will find a number of specimens which have dried in a relatively undistorted state. However, the real bonus is that the Nigrosin will have deposited itself on the pellicle (outer membrane) of the Paramecia thus revealing to you the intricate sculpting of its surface. Of course, this technique will only work with ciliates which don’t undergo lysis (radical rupture of the membrane) upon drying. When it does work, the results are impressive.

Another staining trick for getting some ciliates to reveal yet another secret is to use a bit of a stain mixed with a weak solution of tannic acid. Tannic acid is very effective in triggering the ejection of trichocysts and you can experiment with different stains to see which ones give you the best contrast.
Most of you have, I am sure, stood on a promontory above a lake or a sea and noticed the layered variations in color as your eyes move out from the shoreline. This is the consequence of a large number of factors: depth, mineral content, organic material, blooms of phytoplankton, the amount and angle of sunlight, etc. Carmine and some polychromes sometimes will produce such “lakes” in a drop of water. This is of interest because they can produce a kind of differential staining in those organisms that can endure the drying process without undergoing radical distortion.
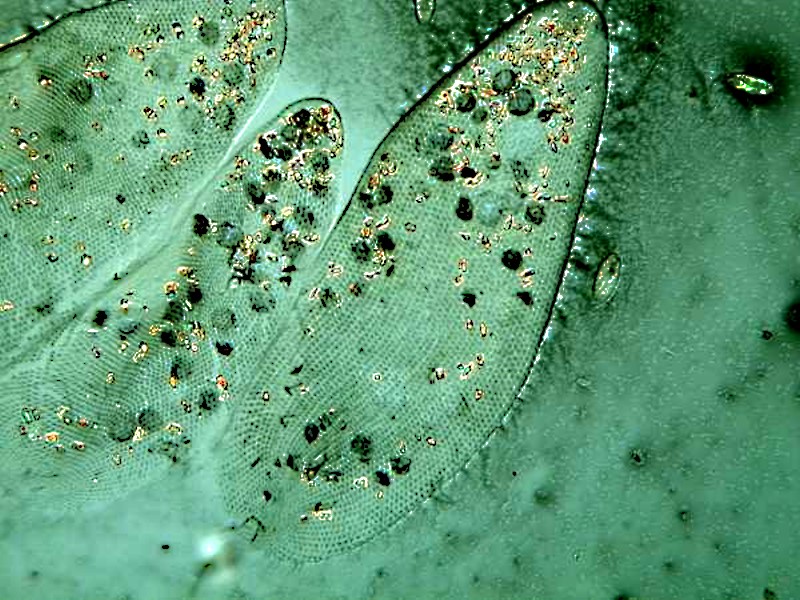
Unless I am using a stain that is also a virtually instant fixative, such as Harris Hematoxylin, I prefer to introduce stains at the edge of the cover glass allowing them to move gradually across the slide creating a gradient of concentration of stain. [WARNING: Harris Hematoxylin contains mercuric oxide which is highly toxic, contaminates glassware, and attacks metal tools. There is now an alternate formula which replaces the mercuric oxide with sodium iodate.] This stain can produce some remarkable results, even when the solution has long passed its expiration date! In fact, I have preparations of some Nigrosin slides and also some Harris Hematoxylin slides which are over 10 years old and though they were originally made up as “quick and dirty” temporary preparations, they have survived remarkably well. Below is an image of Paramecium on an old Nigrosin slide which has no cover glass, but was kept in a relatively dust-free environment.
I also found a specimen of Euplotes on this slide.
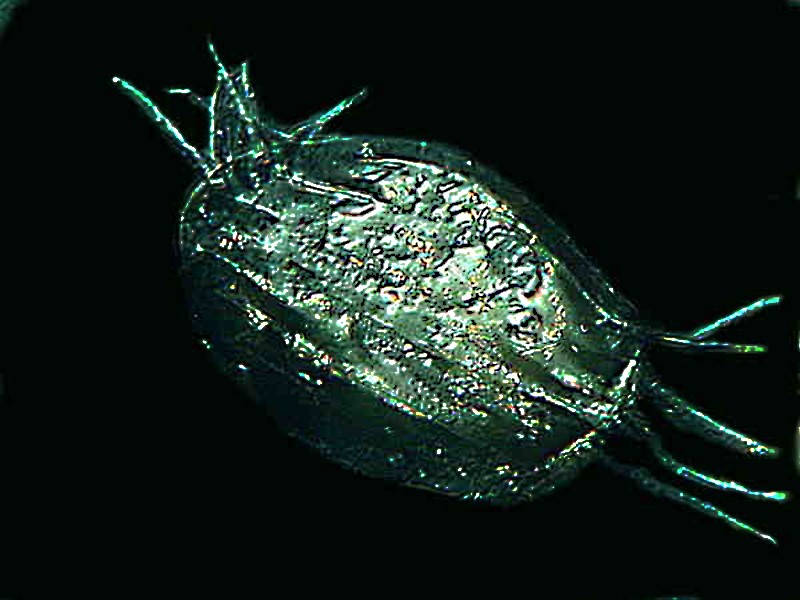
Here you can see the fused bundles of cilia called cirri and you can often observe Euplotes and other hypotrichs crawling along the substrate using the cirri as legs. You can also see the dorsal ridges on the Euplotes quite clearly. With both the image of the Paramecium and that of the Euplotes, I have converted the images to monochrome as well. Each image provides good information.
You can see that the Paramecia are relatively undistorted and that the Nigrosin reveals the hexagonal “cell-like” or prismatic surface of the pellicle.
The Harris Hematoxlyin preparations are also very good; there are portions of the slide that remain sharp. In the image below you can see the Paramecia conjugating.
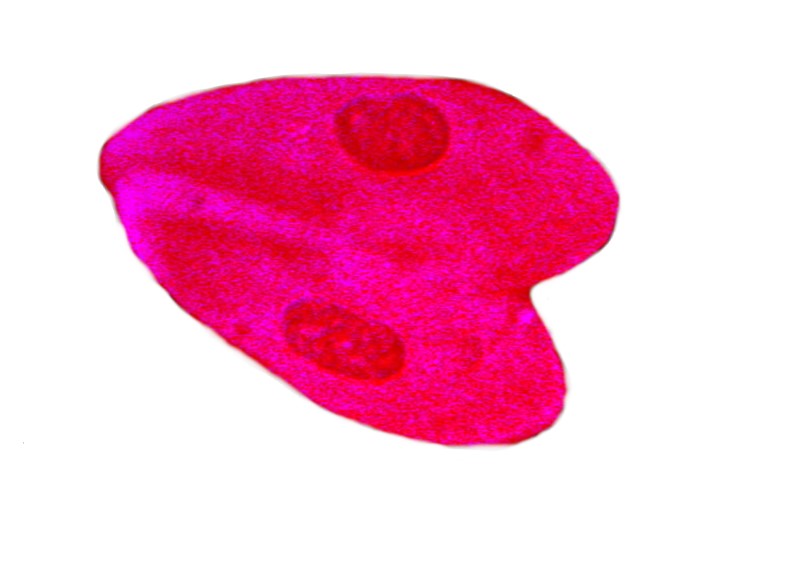
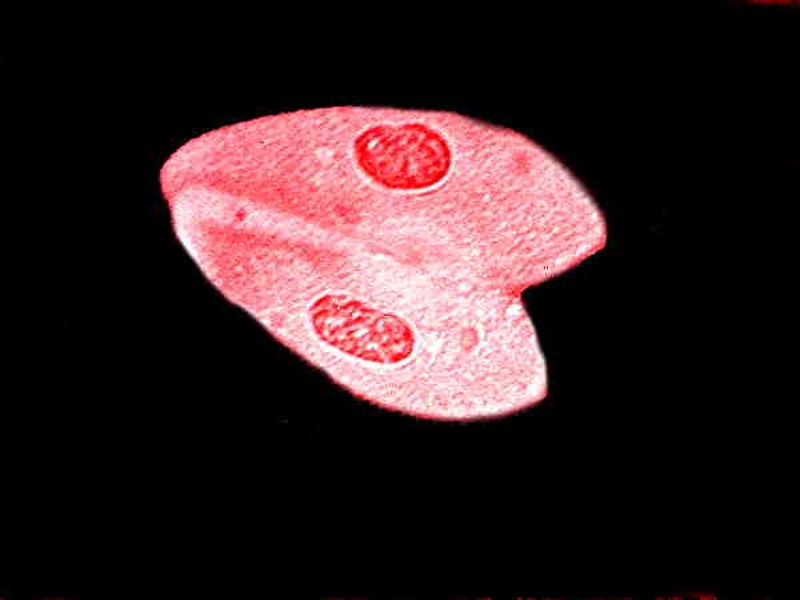
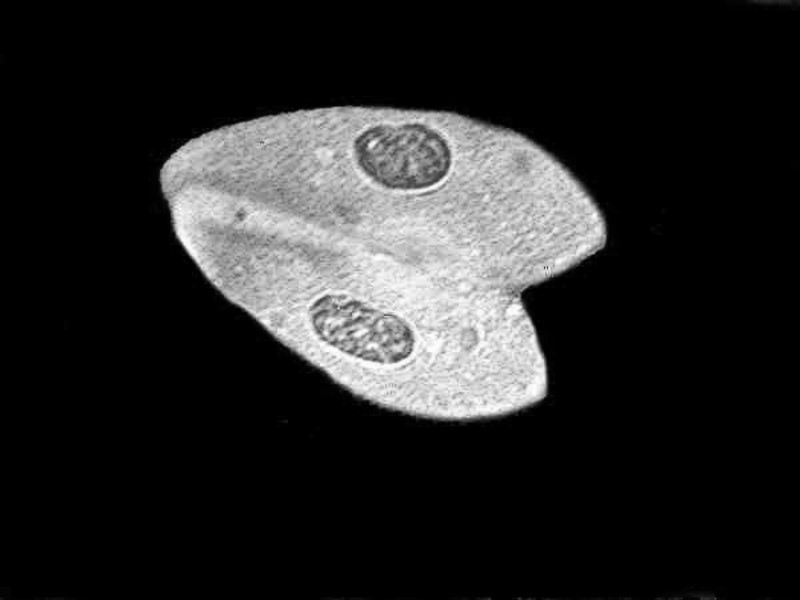
As you can see from the first image, the red background of the stain is highly distracting. In the second, the black background helps considerably in presenting detail, but the third–a monochrome conversion–is, to my eye, by far the best in providing good contrast and detail.
Below is another image of Paramecium stained with Harris Hematoxylin, followed by a monochrome image, this time showing the chromosomes.
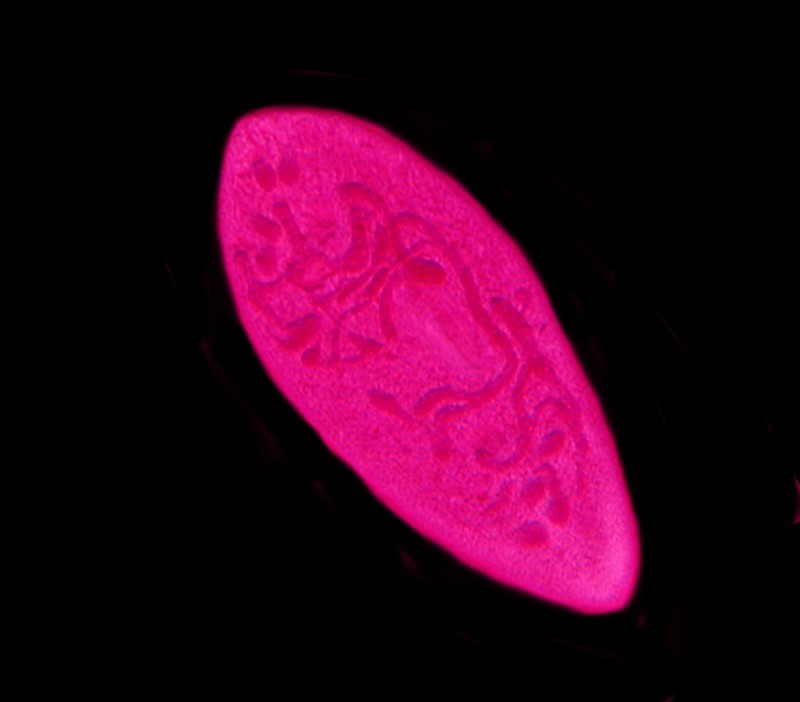
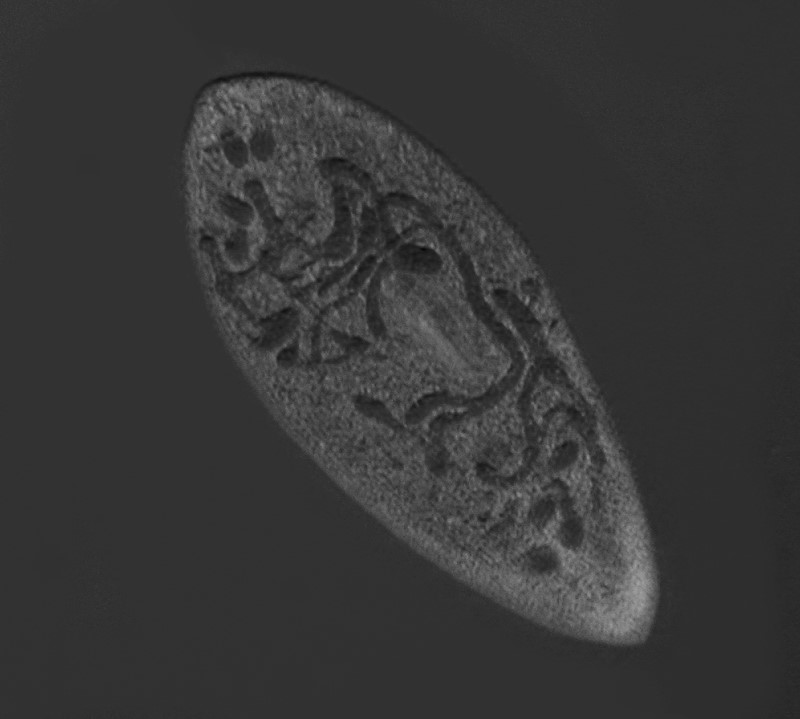
This slide is also at least 10 years old and no mountant has been used; it was simply allowed to dry, so clearly the concept of a temporary mount is relative. I have seen some slides prepared in research laboratories which were meant to be “permanent”, but were so sloppily done that they were useless after a year or two.
For many stains letting capillary action pull the stain from one edge of the cover glass to the other has the advantage of increasing the likelihood of obtaining some very good specimens which are well stained, but not overstained. This is a process which needs monitoring since, usually, you don’t want the specimens to dry out and so you may, from time to time, need to add an additional drop of stain at the edge of the cover glass.
I have always found experimenting with stains to be a fascinating challenge and the range of specimens is virtually endless and there is a very large number of stains–hundreds of them–and many of them were originally developed for the textile industry. Many of them are expensive and/or difficult to obtain but, fortunately, there are suppliers who will provide small amounts of “classical” biological stains at a nominal price and 1 gram of a powdered stain will last a very, very long time. [Always take precautions in handling powdered stains since some of them are quite toxic if inhaled.]
Ward’s Natural Science sells what they call a “trichrome” stain which is proprietary, which means that they won’t tell you what’s in it because they don’t want you making up your own, besides it’s probably cheaper to buy a little bottle of pre-mixed solution, even if you did know the ingredients. From the image below of a stained Paramecium, you can see that you can get some quite interesting results.
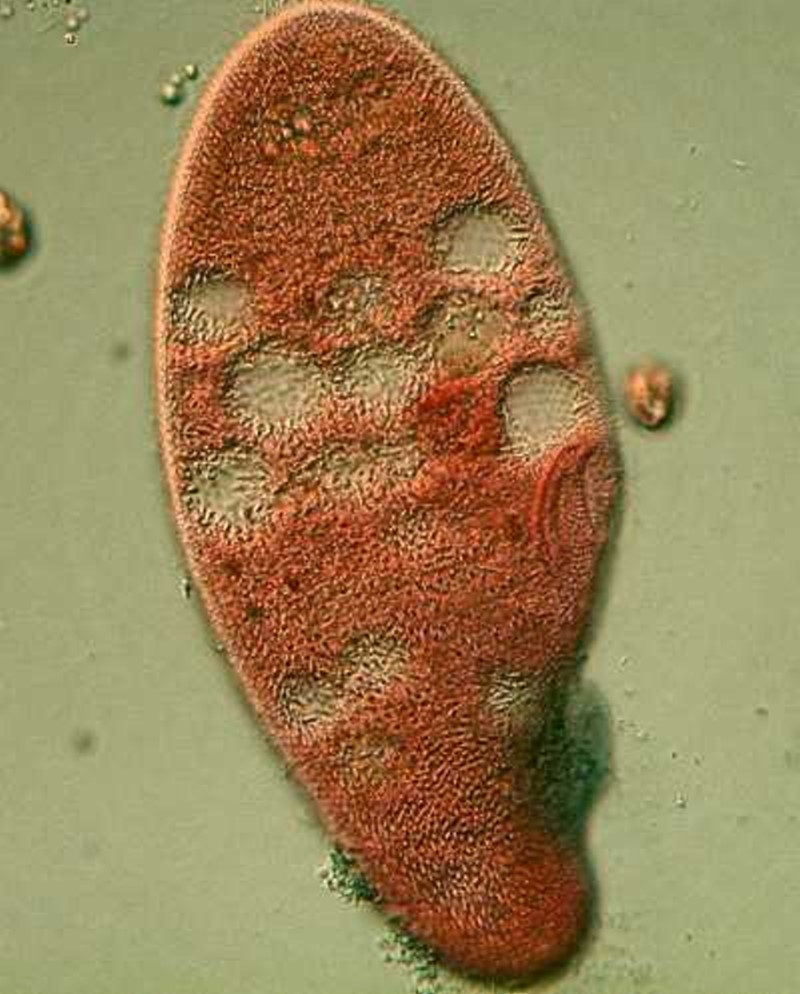
As I looked at the image, I thought to myself that it looks more like Blepharisma than Paramecium so I repeated the process to make sure. It is indeed Paramecium and, in some ways, the most interesting thing about the image is the manner of the staining of the ciliary bundles around the cytostome (mouth). I have experimented with this stain only briefly, but it certainly seems promising.
Protists are only one group of organisms where judicious staining can produce intriguing effects and provide important information. Some time back, I was examining some salps, those wonderful pelagic tunicates that look like small pieces of hand-blown glass sculpture. As a consequence of their remarkable transparency, internal morphology is difficult to discern. It is in these sorts of cases where stains become invaluable. I placed one salp in a small container of 70% alcohol to which I added Orange G and with a second I added Toluidine Blue. I was delighted with the results.
Both stains were effective in demonstrating the muscle bands which the salp uses to jet itself through the water. However, to me, even more exciting was the clear visibility of the neural node and the minute fibers extending out of it.
There is a rather wide variety of planktonic organisms that have a nearly glass-like transparency and staining can often reveal details that might otherwise be overlooked. If you have some Chaetognaths or “arrow worms”, you may be surprised at how much contrast the introduction of a bit of stain provides in showing up the “fins”.
Sometimes plankton samples are fixed in solutions containing chromic acid and, as a consequence, have a light greenish tinge. Adding a stain, such as Orange G or one of the red dyes can provide good contrast thus helping to reveal morphological detail.
Sometimes you might want to observe calcareous structures in situ, such as, sponge spicules in a section of sponge tissue. Fortunately, for us, there is a stain which likes calcium; it’s called Alizarin Red S. However, as you might expect in trying to pry loose secrets from nature, nothing is simple; you can’t just toss in a few drops of Alizarin Red S and expect the calcareous bits to visually jump out at you. As it happens, this stain likes tissues as well, so it is important to prepare your specimen by staining it with something else first to provide contrast and then introduce the Alizarin Red S which will generally “prefer” the calcareous material.
This can sometimes be very helpful when trying to determine whether or not a particular species of ascidian (attached tunicate of “sea squirt”) has spicules. Ascidians can be a real challenge to study as they are loaded with morphological and physiological anomalies and eccentricities. The tunic (outer wall) is composed largely of cellulose compounds which means that the usual techniques such as those used with sponges designed to dissolve away the tissue and leave the spicules, are ineffective. With many kinds of tissue, one can treat them with caustics such as, potassium hydroxide or sodium hypochlorite to determine if the tissue contains spicules. With some ascidians, it is relatively easy to cut thin sections with a sharp scalpel and find spicules either by further careful dissection or by staining with Alizarin Red S. However, there are a number of ascidians that have tunics that are either so heavily pigmented and/or so leathery that drastic measures are required. There are 2 species of Styela which I obtained from California which present special difficulties. Both species are strongly pigmented and have tough tunics and, in fact, on one species I broke the blade of the scalpel trying to cut off a section. Then I had difficulties trying to use heavy-duty dissecting scissors and finally ended up using bone cutters to remove a piece so that I could work on it to try to obtain a thin section. I am still working on this process and if I get some acceptable results, I’ll let you know in another article.
On three occasions, I tried the enzyme cellulase to dissolve out the cellulose, but the results were unhelpful either due to my incompetence and ignorance and/or the utterly perverse and recalcitrant nature of these wonderfully, preposterously, idiosyncratic creatures. It occurs to me that with the cellulose compounds in the tunic, some botanical staining techniques might be successful, but that’s still on my list of 738 projects yet to be done.
A very good stain for nuclei which can be used on living material, but which in the process of staining, kills the protists or cells in tissues is Methyl Green Acetic. To a relatively strong solution of the stain add enough acetic acid to make the overall solution about 1% acid. This can give quick and striking results. It will also work on material that has already been fixed, provided the fixative did not contain acetic acid.
Another technique which is sometimes very helpful and striking is the use of a pigment or ink to tint the background. The idea is to use substances that are minimally or not at all absorbed by the specimens. Perhaps the most impressive demonstrations derive from the use of India ink with algae which have transparent gelatinous membranes. One can observe these algae many times without realizing the existence of such a membrane. The simplicity of the technique makes the effects all the more striking. India ink is essentially very finely ground carbon particles suspended in water in which they are insoluble. For those of you who are eccentric enough to still like to write with a fountain pen as I do, you have probably, like me, gotten tired of soaking nibs clogged with particles from black ink and have shifted to blue or some other color (Wow, it’s fun to talk about low-tech stuff that the youngsters have never heard of or have seen only in museums. It almost tempts me to go back to a typewriter, an abacus, and a rotary dial telephone.) The addition of a drop of India ink to a drop of a rich algae sample will very often reveal some specimens with such a gelatinous envelope and will provide you with quite a new conception of these species.
Stains are worth trying on almost any kind of specimen and even micropaleontologists sometimes use ordinary food coloring to bring out the surface details of forams. The possibilities of staining techniques are so vast that one could quite literally spend many years experimenting with a virtually endless variety of specimens and almost assuredly producing some interesting, and quite possibly, new results. Keep good records and when you find something intriguing, write it up and send it to Micscape.
All comments to the author Richard Howey are welcomed.
Editor's note: Visit Richard Howey's new website at http://rhowey.googlepages.com/home where he plans to share aspects of his wide interests.
Microscopy UK Front
Page
Micscape
Magazine
Article
Library
© Microscopy UK or their contributors.
Published in the June 2015 edition of Micscape Magazine.
Please report any Web problems or offer general comments to the Micscape Editor .
Micscape is the on-line monthly magazine of the Microscopy UK website at Microscopy-UK .
©
Onview.net Ltd, Microscopy-UK, and all contributors 1995
onwards. All rights reserved.
Main site is at
www.microscopy-uk.org.uk .