
By Ian Walker.
Recently I purchased an old
Zeiss Standard RA microscope from the States, unfortunately it has a basic
stage fitted
without the X-Y calibration markers.
X-Y calibration is almost essential if like me you like looking at say diatom strews and want to make notes of interesting examples and wish to record their positions for future reference. Even the cheapest Chinese microscopes tend to have some sort of calibration of the stage and this seems a strange omission by Zeiss but in the case of you having the same problem with your scope here are some of my ideas.
Since each stage and slide holder is different on various manufacturers scopes I can only give guidelines, you will have to decide the best method of say reading of the scales and mounting the scales in viewable positions etc.
Shown below are my calibrations that are simply made using any cheap CAD drawing package, I used an old version of TurboCAD called TurboCAD 2D V6.5. Since each CAD program is different I can't go into details of how the drawing is made, but the main thing is to have the page zoomed in several hundred percent and use snap to grid for your calibration lines.
The first thing to do is to cut a small piece of paper and put it under the slide holder and mark the two extremes of both the X and Y controls, now measure this, in my Zeiss this is exactly 24mm in the Y direction and 24mm covers enough of the horizontal movement of the slide so I only have to make one drawing and print it out twice.
Now using my CAD program I drew a horizontal line of 24mm and sub-divided this with 0.5mm vertical lines, at each 5 division point I made a longer vertical line for a numbered calibration point, I used a horizontal grid spacing of 0.5mm and vertical grid spacing of 2.5mm and use snap to grid.

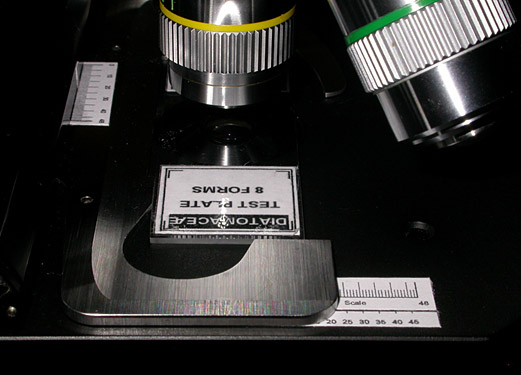
The Y scale at the bottom of the picture can be seen here, the actual reading is made at the right hand edge of the slide holder, so here it's reading about 23.8, [I can read my scale to an accuracy of around 0.1mm]. Tests show with 7X to 10X eyepieces and objectives up to about 20X I can usually replace the subject back into the field of view but I recommend 10X objectives when trying to re-locate your X-Y readings for their wider field of view.
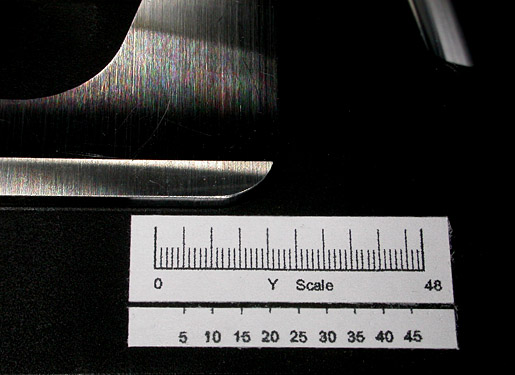
Shown below is the Y calibration strip magnified several times with the slide holder moved way out of its normal position, each small line represents 0.5mm and the whole scale is 24mm long or 48 divisions X 0.5mm, however the scale can be any arbitrary unit that suits. The paper scale is simply glued on with a glue stick and moved into its final position with the Y control at its upper most position and lined up with the zero marker on the scale. Since the slide holder moves over the stage with a tiny gap there is no rubbing of the scales.

All comments to the author Ian Walker are welcomed.
Please report any Web problems or offer general comments to the Micscape Editor.
Micscape is the on-line monthly magazine
of the Microscopy UK web
site at Microscopy-UK.