Cloth Microscope Dust Covers
by Robert Pavlis, USA
One of the most serious problems in microscopy is dust. Small bits of material become suspended in the atmosphere and settle on exposed surfaces. When those exposed surfaces are microscope lenses there is an obvious problem. Dust coated lenses then need to be cleaned. Unfortunately many types of dust particles are abrasive—and damage to expensive lenses can result. Furthermore, even without abrasive particles the act of cleaning lenses entails some risk of optical damage.

Many microscopes are sold with wooden cases. However, when microscopes are stored away in cases they tend to fall into disuse—it often seems to be just too much trouble to remove the microscope from its case and set it up. It also is simply not practical to keep microscopes that are used frequently in these cases.
Furthermore, storing microscopes in dark wooden cases can have another disastrous consequence in warm and humid climates—fungal growth on lenses.
Many microscopes are also sold with dust covers. Even top manufacturers tend to supply basically plastic bags for this purpose. The sheet plastic film used here is a truly horrible material for this purpose. Some plastic films contain plasticisers that can condense on surfaces—very bad should those surfaces be microscope lenses!!!
The best microscope covers are made of cloth. One can occasionally find vendors that sell cloth microscope covers, but these usually have one serious disadvantage—they are made for "generic" microscopes and seldom have the proper dimensions for the specific microscope for which they were obtained!
Generally to have a properly fitting cloth microscope cover, this cover needs to be specially fitted for the particular microscope. This, it turns out, is extremely easy to do—requiring only proper fabric and a sewing machine.
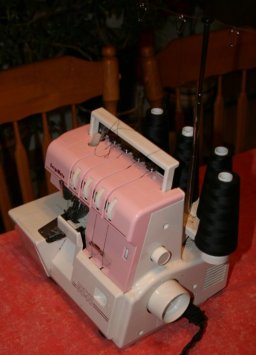
Any sewing machine can be used for the purpose, however, over lock sewing machines (sometimes called sergers) are best. The serged seam that results does not unravel, and it has a quality professional appearance. Running a serged seam around the base of the cover makes hemming it unnecessary. Over lock sewing machines, however, are not mandatory—but they do make the job much easier and produce a more professional looking cover.
It is very important to choose the cloth carefully. Some fabrics have a great tendency to produce lint. For a microscope cover this is very bad! Furthermore the cloth must be finely woven to prevent dust passing through it. Closely woven synthetic fibres seem best. Most nylon fabrics tend to unravel along cut surfaces. Some acrylics seem to produce a bit of lint. Fairly heavy polyester seems best—the type used to make trousers and similar items. Of course colour does not matter. When one is choosing fabric one should remember that about any fabric that does not allow dust to pass through it, and that does not produce lint is suitable.
Most microscope covers are best made from three pieces of cloth cut to the correct dimensions before sewing. The best shapes for the sides are almost always rectangles with one corner cut off at an angle. (A few microscopes are better served with sides that have both of the upper corners cut off at an angle.) It is best to make a pattern for the side panels. A good way to do this is to attach a large piece of paper to a wall, set the microscope in front of the wall, and then project a narrow beam of light on the microscope so that the shadow of the microscope falls on the paper. One can then trace out the outline of the microscope on the paper, and then take the tracing and decide on the best exact shape for the final cover. The cloth sides should be about 5 cm wider than the maximum dimensions of the microscope in every direction.
The third piece of cloth needs to be a long rectangle, slightly wider than the maximum width of the microscope. Once one has a pattern for the sides, and knows the length and width required for the long piece that serves as front, top and back of the cover, it is a simple matter to cut out the cloth to that size, and sew the pieces into a cover. (One does have to be careful to sew the pieces so that the correct side of the cloth ends up on the outside in the final product. The standard sewing rule of "right sides together" applies here.
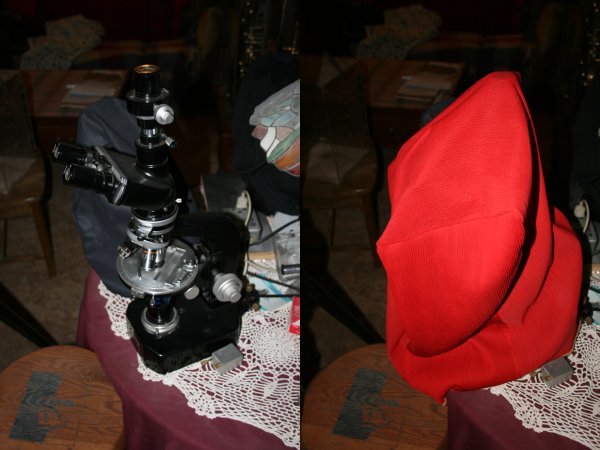
After the cover has been sewed together the bottom seam should either be hemmed or an over lock stitch placed along the bottom. The images below show a Nikon polarising microscope and it with a cover made this way.

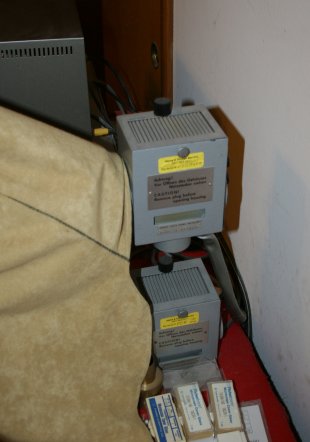
 When producing covers for microscopes with epi illuminators it is best to make the cover in such a manner that the lamp housing is NOT covered by the cover. This is a serious safety consideration, because covers that cover the lamp housing may ignite if the lamp be left on. The image to the left of this text shows a fluorescence Leitz Orthoplan with a cover that was designed to leave the lamp housing uncovered.
When covers of this sort are used with ordinary upright microscopes any dust getting under the cover generally does not settle on the objectives because they are facing down. Dust generally does not accumulate on oculars because the cover typically lies just above the glass surfaces, so dust tends not to get in. The condenser tops, however, are prone to having dust depositing on them. This can be dramatically reduced by always leaving a clean slide on the stage when the microscope is not in use. Dust also tends to collect on the sub stage illuminator. This can be reduced by either placing a small piece of lint free cloth over it, or else by placing a clean plastic jar lid over it.
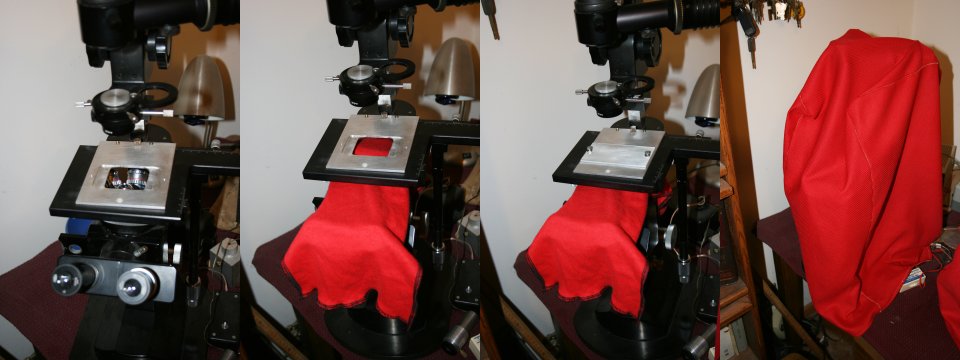
Inverted microscopes present a special serious problem. Both the objectives and oculars have their exposed surfaces pointing upward where dust can settle on them under the cover. One can cut a cover from aluminium stock and place it over the slide carrier if the dust problem be minor. However, a better solution is to cut a simple rectangle of soft lint free polyester cloth and pull it between the stage and the objectives when the microscope is not in use. With many microscopes a piece of cloth like this can be made long enough so that it also covers the oculars. (Covers for inverted microscopes tend not to cover the oculars closely, because they are on the side of the microscope.) The Wild M40 shown below is stored with a large cover over the entire microscope, a metal stage cover, and a cloth rectangle over the objectives and oculars. (Notice that it also has a machined cover for its condenser!)

If one find that a cover produce lint, washing it will often eliminate the problem.
People who use microscopes in areas of high humidity have a special problem. Fungus may grow on lenses. Allowing bright light to shine on the microscope tends to be helpful, as does better air circulation. Keep the microscope in the driest place available. It is generally a bad idea ever to store microscopes in wooden or plastic storage cases in this kind of environment. Here one should use just cloth covers even for microscopes that are seldom used.
Microscopes stored and used very near the sea can have serious problems from salt. In tropical marine environments the only way to prevent fungal damage may be placing the instrument in a large polyethylene container with desiccants.
Dust can often be removed from lenses by carefully brushing it away with high quality brushes. Remember serious damage can result to lenses by improper cleaning. Most damage comes from either (1.) improper use of solvents, or (2) the use of abrasive or contaminated lens tissue. In the October 2007 issue of Micscape there was a discussion of microscope maintenance and repair that discussed how to clean lenses without damaging them.
All comments to the authors via Robert Pavlis are welcomed.
Microscopy UK Front Page
Micscape Magazine
Article Library
Please report any Web problems or offer general comments to the Micscape Editor .
Micscape is the on-line monthly magazine of the Microscopy UK website at Microscopy-UK